The ubiquitous Flowerpot antenna has been around since about 1993, but the origins go back to the mid 80’s. Have a look at John VK2ZOI’s page for a bit of a history lesson.
The single and dual band versions are cheap to make and perform well, as long as you stick to the dimensions given. They are great for portable and permanent installations, as they are unobtrusive, very light in weight and it’s easy to keep the weather out of them.
They are an excellent club project, and an ideal 1st antenna for a new Foundation licence holder or indeed any licence level. Especially if you’re on a budget!
I got inspired to revisit this antenna when I was rummaging in my shed, and found this old 2 Metre band Flowerpot that I picked up from the Adelaide Hills Hamfest, quite a few years ago now. These were offered by (I think) one of the local clubs and were very reasonably priced, so I bought one to try, with the intention of using it as a packet/aprs antenna. I never did use it, but it was probably best I didn’t, because when I put it on the nanoVNA it showed it was resonant at about 130 Mhz. This was quite puzzling, but then the penny dropped. The Antenna was made from 32mm PVC, instead of the specified 25mm. This has the effect of lowering the self resonant frequency of the coil to around 100Mhz. I decided to dissect the antenna in the name of science to check the lengths that the radiators were cut to, and sure enough, they were trimmed for a 2 M half wave flower pot.
As I wanted to make a new base antenna for my home QTH , specifically one that did both 2 Metres and 70 cm, I decided to have a look at the “Experimental Dual Band High Gain Flower Pot Antenna” that John describes on his page here. I built it as shown, but I found that I could only get 6 turns on the 25mm PVC with the published length of the half wave phasing section given. I found it was actually resonant at around 137 Mhz, so I lengthened the 1/2 wave phasing section to give me 7 turns on antenna number 2, and this actually bought the resonance up to 144.2 Mhz. This was looking more like it, so I trimmed the top radiator length by about 25mm, and this raised the resonant frequency to about 145.5 Mhz. I then added the 2 conductive sleeves as described, using aluminium foil, to make the antenna resonant on 70 cm. This proved to be very successful. The nanoVNA showed about 1.2:1 on 145.5 and 1.1:1 on 439Mhz. The nanoVNA proved to be an absolute godsend when testing and pruning any antenna, and if you haven’t got one yet, then “Do yourself a Favor” as Molly Meldrum says! Even if you don’t understand the nanoVNA, or the Smith Chart – I didn’t to begin with, the learning curve isn’t steep and you’ll gain a much better understanding of what your antenna is doing and the relationship between SWR and resonance. For the price you just can’t go wrong.
Building it…
***The original Flower pot antenna called for grey 25mm Conduit. I couldn’t find this stuff so I used 20mm PVC water pipe. The outside diameter is 27mm. This seems to be a good substitute, and doesn’t break the design***
The PVC pipe I’m using comes from Bunnings…this should be universally available throughout their stores Australia wide. It is a plumbing pipe, white in colour, and is their 20mm pipe. The outside diameter is 27mm. They sell it in lengths of 3 metres – you’ll need one length per dual band antenna. You’ll also need a suitable 20mm endcap for the top of the antenna, and, optionally, one for the bottom, depending on how you mount the antenna, the connector and deploy it.
The Coaxial cable – I used was marked “GME Commerical Grade RG58 Coax” But really, any quality RG58 cable should do.You might like to use marine grade cable, as this is white, and is less susceptible to the ravages of UV from ‘ol Sol if your antenna will be outside in the blazing sun all day, everyday. Make sure the coax is 100% braided, of high quality and has no foil. You’ll also need some kind of a suitable RF connector for the antenna . I highly recommend an N connector, especially for something that will have RF at 400+ Mhz
Aluminium Foil – About 500mm. It’s in your kitchen cupboard.
Tools – A sharp knife, Heatshrink tubing , A Tape Measure, an Electric drill with a 6mm bit and a decent marker.
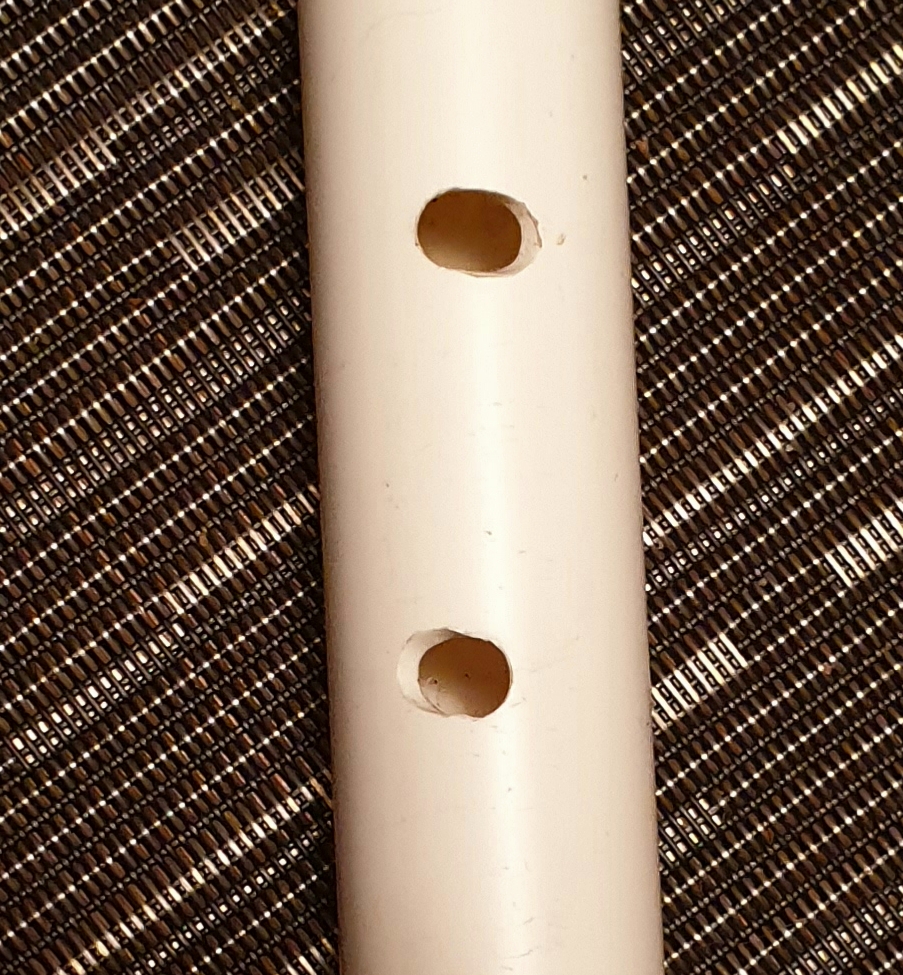
Handy Tip 1: Drilling the holes for the coils The 6mm holes in the PVC are made with the drill and elongated at an angle so as to accommodate the cable to smoothly transition leaving the hole and lay flat on the pipe, as shown here at right.

Handy Tip 2: Winding and counting coil turns – here is how I wind and count the turns on the coils. S = Start In this example there are 7 turns.
Use the diagram from Johns’ webpage to cut your coax and prep it. The same goes for your PVC pipe. The sleeves are simply aluminium foil from the kitchen…here are some pictures to help you visualise what needs to be done…


Begin by feeding the coax up from the bottom of the PVC to the first hole and then wrapping the 9 turn coil, feeding the remaining coax up to the 3rd hole , winding the 7 turn coil and back in hole number 4 and up to the top. Secure the wire with some line and the end cap as shown,
Finish up by fitting your connector of choice to the coax, and wrapping the coax coils with tape or heatshrink to secure them. Ill leave how you wish to mount the antenna up to you. I just taped mine to the top of an 8 metre length of pipe with some strong waterproof tape and tucked the coax connector back up the PVC pipe to keep it out of the weather… 
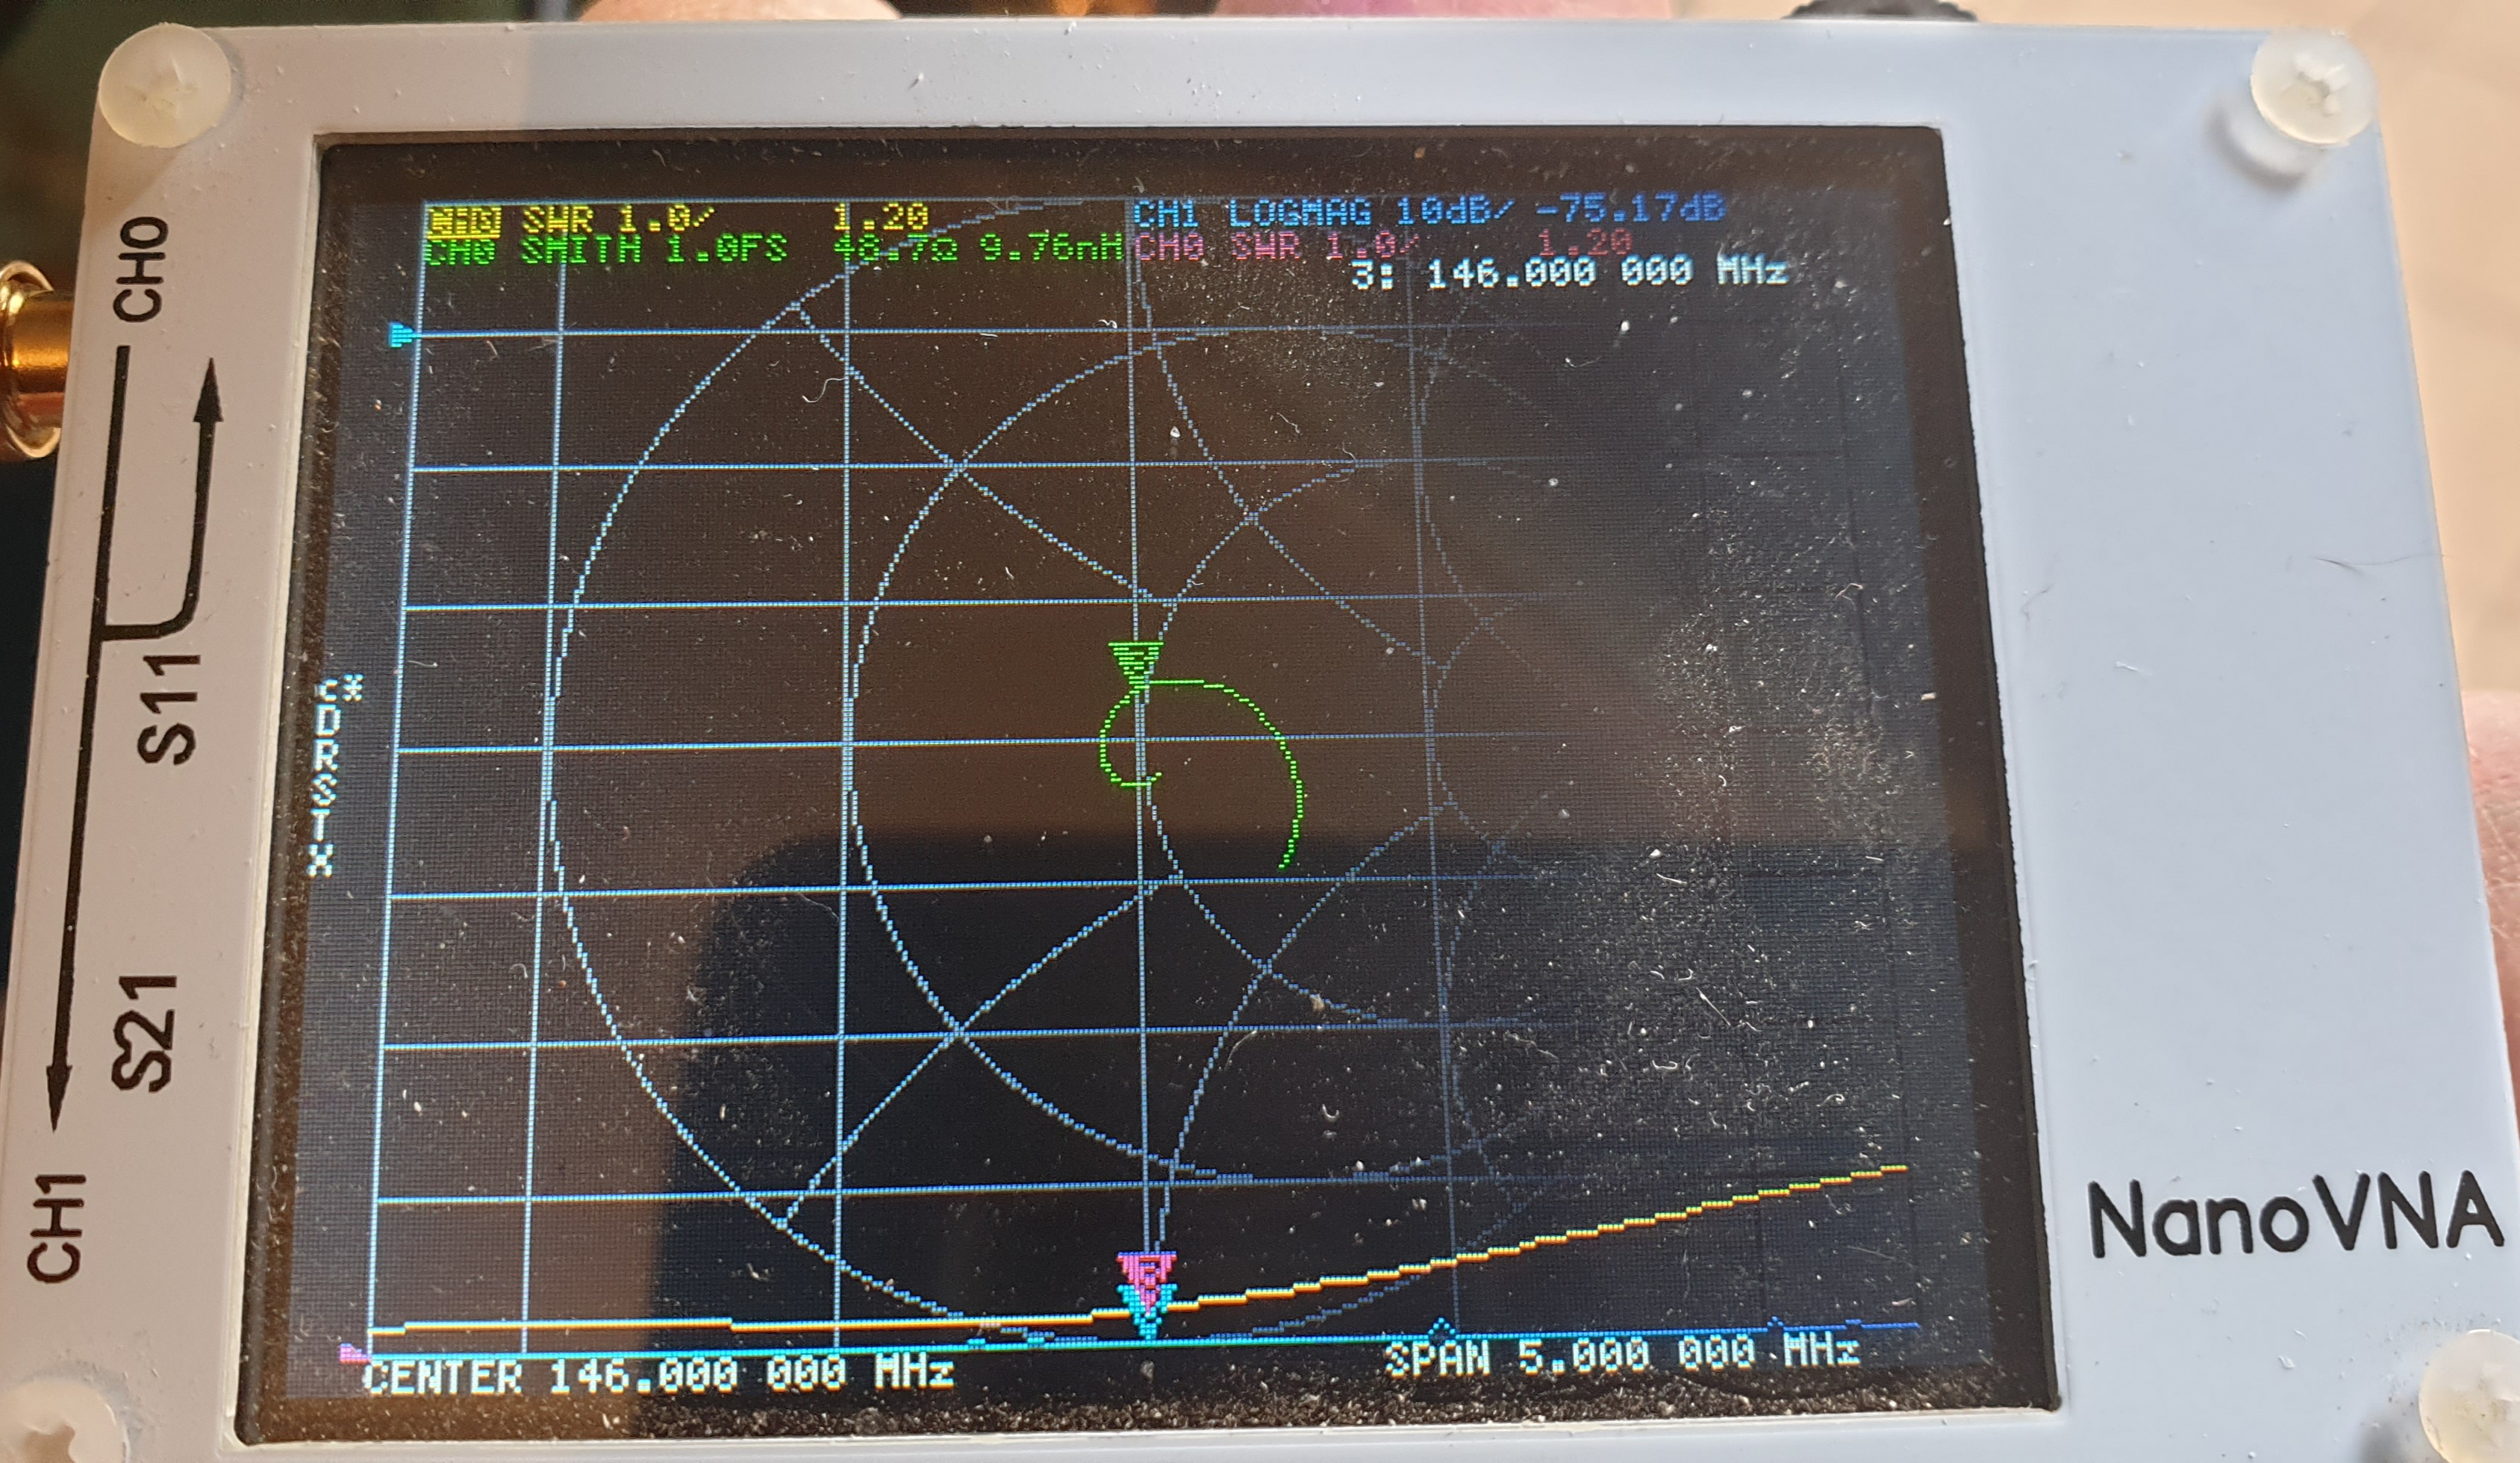
I checked the antenna back at the shack end of the coax and here’s what the nanoVNA has to say…
Here is 2 metres, the VSWR is 1.2:1 Resistance is 48 Ohms at 146Mhz, reasonably flat across the band…
And at 438Mhz, we have a VSWR of 1.36:1, 50.2 Ohms. Pretty good!
This mean our transmitter is happy to deliver full power into the antenna . How well does it work? For such a simple antenna, the performance is excellent! I’ve had my dualband flowerpot antenna up for a few weeks now, and it’s a solid performer on both bands. Simplex and repeater contacts are no problem, and I’ve been able to regularly get into the Ouyen, Victoria 2M repeater @ 179km away on many occasions, and other, more distant repeaters, especially in the mornings when there is a bit of lift. I’m looking forward to the summer E’s and troppo season.
The antenna has worked well for listening to telemetry from the project Horus balloon launches on its 70cm SSB downlink with my Icom IC910H.
The ISS has recently enabled a dualband repeater onboard with an uplink on 145.990 with a 67Hz tone and a downlink on 437.800. The flowerpot works well here, Even though it’s chaotic to try and get in, I have been able to access the repeater on several occasions, even with elevation angles of only 7 degrees above the horizon.
In short, the dualband flowerpot is great project for your shack, whether you’re a seasoned Ham of just starting out in the hobby. I was motivated to build it because of its low cost and simple construction. This antenna would make an excellent club project. Build one and let me know how you go!
My antenna has now been up for over 6 weeks and its performance continues to impress me.
Andy – VK5LA
